

Coloring with a Gradient Mesh in Illustrator
(available in video format here)
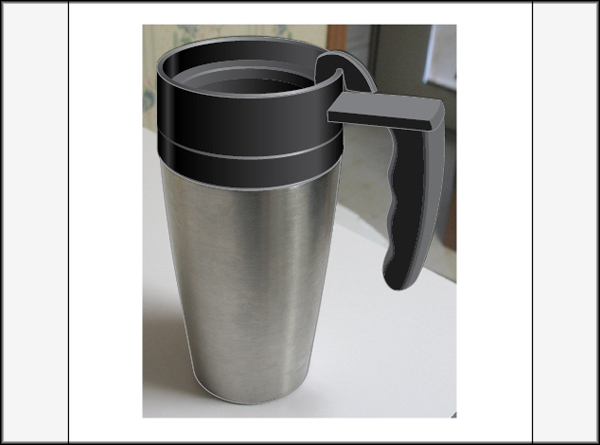
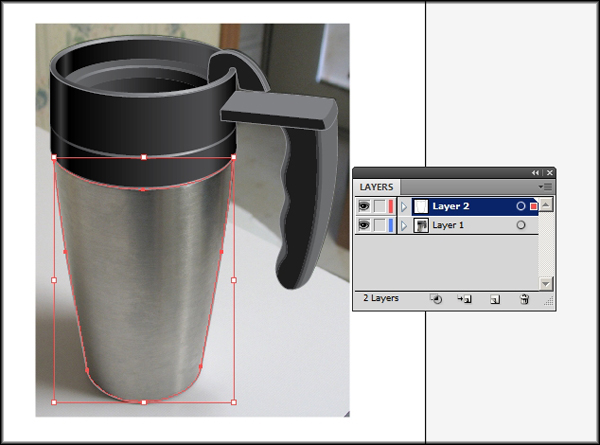
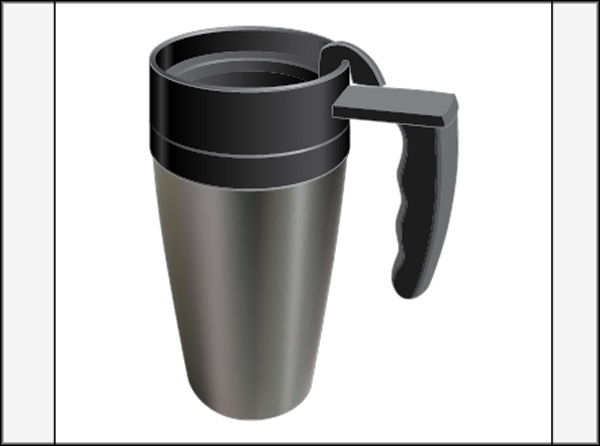
For this this lesson we’re going to use a previous illustration created in the tutorial called Creating a Vector Travel Mug in Illustrator. Using the Mesh Tool we’ll create a realistic looking silver bottom for this coffee mug.
In the previous tutorial we had just finished creating the mug and colored the bottom section using a gradient. It looked good, but if you want a more realistic look the Mesh Tool does a does a much better job.
Keep in mind that some Microstock sites such as iStockphoto want you to indicate in the description of your vector art that you have used a Gradient Mesh so that the customer is aware of it.
Using our previous art, make the fill for the bottom part none. Keep the outline. Place and line up the original image of the mug behind the art.
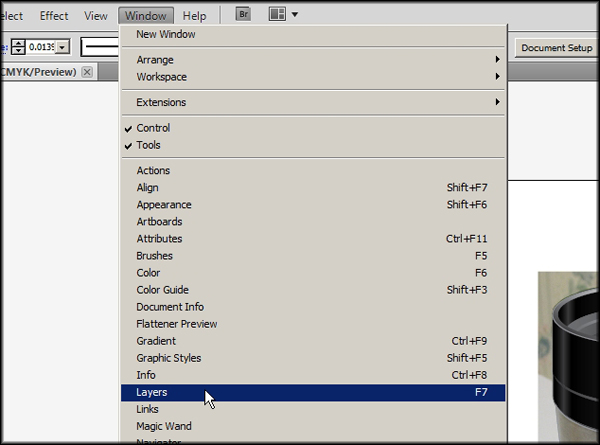
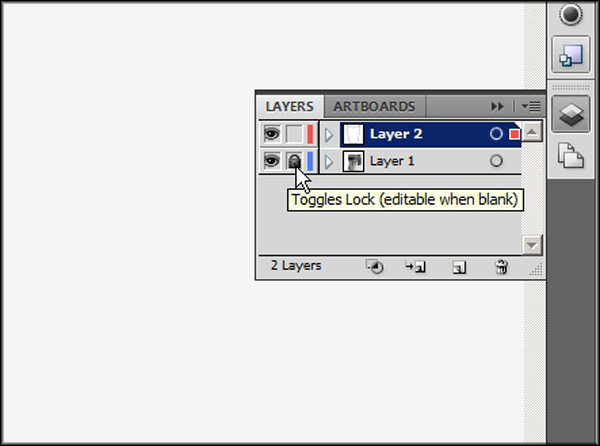
Copy (Ctrl+C) the bottom object and create a new layer by going to Window in the top menu and selecting Layers. You can also open layers from the panels on the right side of your screen.
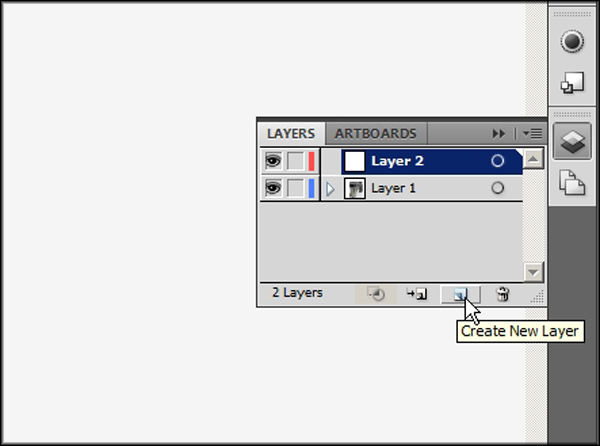
At the bottom click on Create New Layer.
Make sure you have nothing selected and Paste in Front (Ctrl+F) the object onto the new layer.
Lock layer 1 by clicking on the Toggles Lock square.
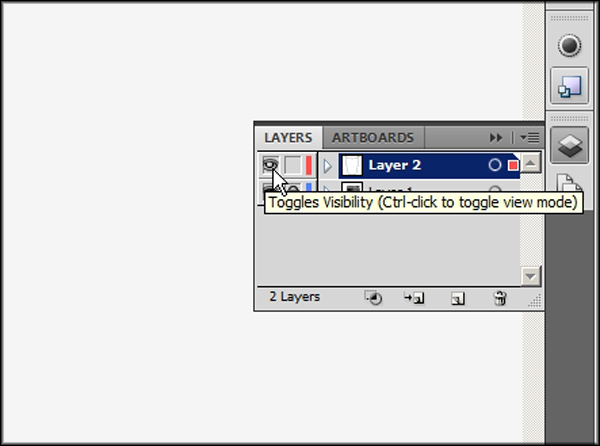
On the layers panel click on the eye next to Layer 2 while holding down the Ctrl key. This changes the view of that layer to outlines. To change it back repeat the process . This becomes important in the next step.
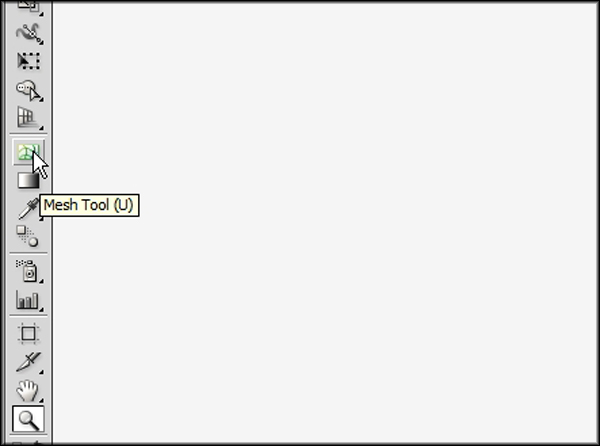
Choose the Mesh Tool from the tools on the left.
Click along the top line of the object to place mesh grid divisions. Choose areas where the color is at it’s most dark or most light. Here is an idea of where you may choose to place the sections of the mesh grid.
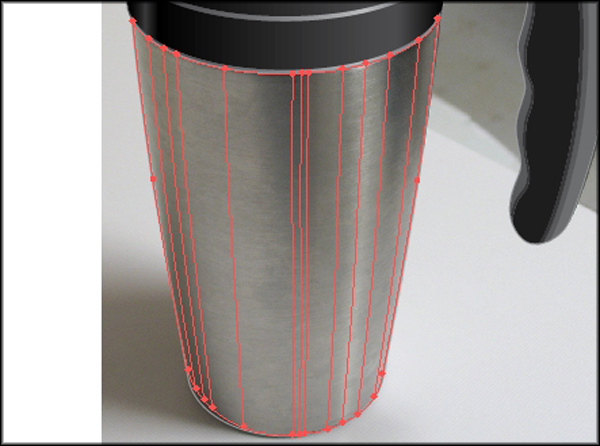
If you double-click within the object and not on the edges a point will be placed within the object. Since the lights and shadows only run vertically on this object I’ve tried to limit the points to the edges.
Once you have your divisions chosen you can color the mesh.
Click on the Direct Selection Tool (A)...
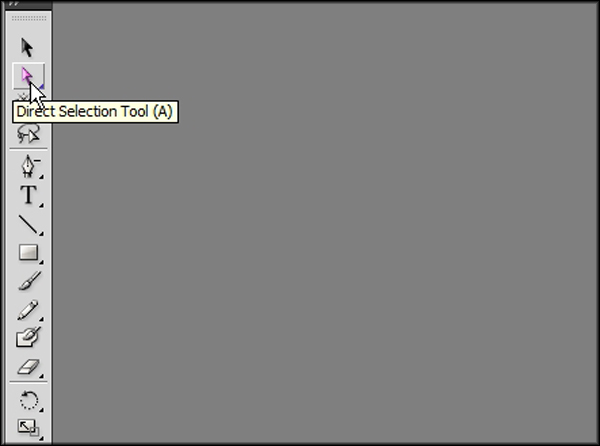
...and then on the Eyedropper Tool. If you hold down the Ctrl key you’ll see that your tool toggles back to the Direct Selection Tool.

To color a point hold down Ctrl, select the point, release the Ctrl key to bring back the Eyedropper and move it just off the point onto the image. Click to select your color. To see the change ctrl+click on the eye on the layers palette.
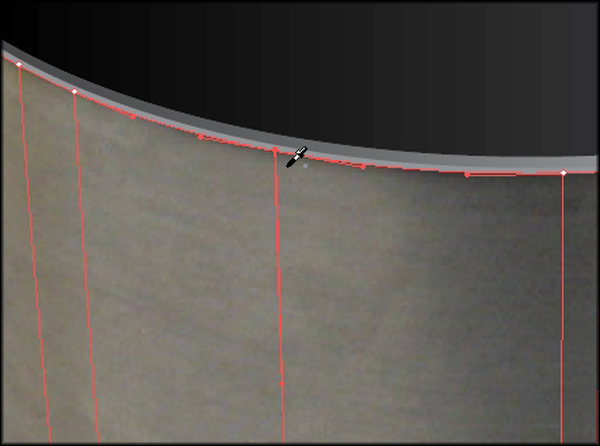
Continue doing this to the other points defining your mesh grid. Once you have colored all of your points along the top and bottom you can look the whole thing over and make any corrections you may want to make.
The mesh can be as closely colored to the original image as you want it to be. Once your happy with how it looks you can delete the background and you’ve completed you’re vector gradient mesh.
Next I suggest moving on to the tutorial called Creating an Illustration From Hand Drawn Art in Illustrator.